
Bucket Fill Transparency with GIMP
Serge Y. Stroobandt
Copyright 2015–2016, licensed under Creative Commons BY-NC-SA
- Home
- IT
- Graphics & Fonts
- GIMP Transparency
Problem
In most GNU/Linux distributions, GIMP (short for GNU Image Manipulation Program) happens to be the default application for pixel and photo editing. (Note that Krita is also an excellent application, which additionally offers native CYMK support for press printing.) If you are coming from the prohibitively expensive Adobe Photoshop, you might be surprised not to find a bucket fill tool for filling areas with transparency.
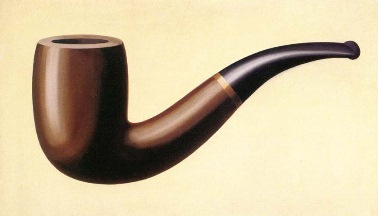
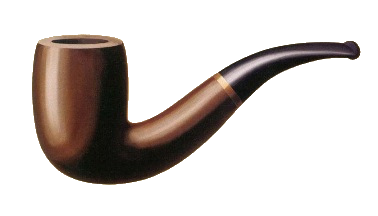
La trahison des images by fellow countryman René Magritte;
partly vandalised for the purpose of this tutorial.
Add an alpha channel
Some image types lack a transparency channel; JPG for example. If this is the case, add an alpha transparency channel. This is done by selecting Layer → Tranparency → Add Alpha Channel.
Bucket fill with colour [optional]
The next step is optional and consists in filling the area that should become transparent with a plain colour first. Select the bucket fill tool or hit Shift+B. Within the Bucket Fill toolbox options, select Fill transparent areas only when necessary. Do select BG colour fill and Sample merged and run a few tries while adjusting Threshold for best results. In between, hit Ctrl+Z to undo.
Some colour mixing will be inevitable and even desired. (In this respect, Adobe Photoshop is no different.) Hence, choose a colour which is compatible with the background on which the resulting picture will eventually be used. Click on the background colour rectangle in the upper half of the Tool Options toolbox window to change the background colour. Here, I used f3f3e9 as a background colour for plain colour filling. However, one can also use the eyedropper tool to pick a colour from anywhere on the desktop.
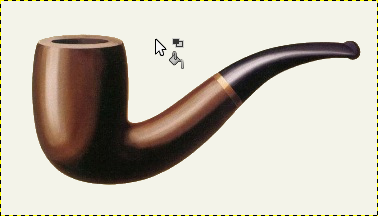
Bucket Fill applied. Choose a fill colour which is compatible with the background on which the resulting picture will eventually be used. This is because some colour mixing is inevitable and even desired. Here, I used f3f3e9 for plain colour filling.
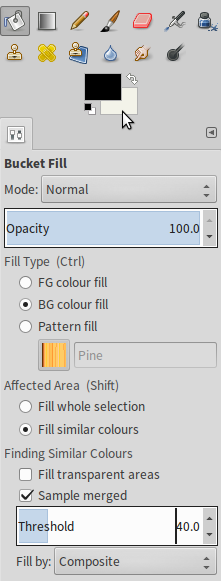
Bucket Fill: Select Fill transparent areas only when necessary. Do select BG colour fill and Sample merged and run a few tries while adjusting Threshold for best results. In between, hit Ctrl+Z to undo.
Select by colour
The right thing to do now is Select → By\ Colour. It might be tempting to perform Colour to Transparency, however this would also change semi-transparent areas within the desired image area. This time around, do select Fill transparent areas as well as Sample merged. For this particular example I chose not to apply Antialiasing nor Feather edges. Nonetheless, do experiment with these settings and choose what looks best. Again, run a few tries while adjusting Threshold for best results. In between, hit Ctrl+Z to undo.
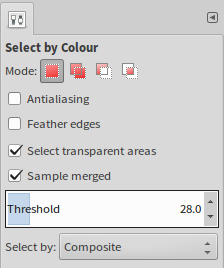
Select by Colour: This time around, do select Fill transparent areas as well as Sample merged. Again, run a few tries while adjusting Threshold and experiment with Antialiasing and Feather edges for best results. In between, hit Ctrl+Z to undo.

Select → By\ Colour applied
Subtract from the selection
At times, it proves difficult to get the colour selection exactly right. Some of the desired image area might be selected as well because the colour matched. In this case, and barely visible, nine desired pixels in the middle of the pipe were also selected for deletion. When this happens, use Ctrl+Drag with a Select tool of your choice to select a subtractive selection area.
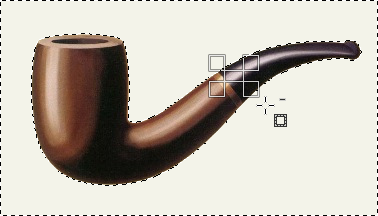
Use Ctrl+Drag with a Select tool of your choice to select a subtractive selection area.

The desired transparency area is now selected.
Grow the selection [optional]
At the rim of the desired image, some shades of the background my still remain unselected. If this is the case, grow the selection with a pixel using Select → Grow… → 1px.
Delete
Once the desired transparency area is selected, simply hit Delete.
Once the desired transparency area is selected, simply hit Delete.
Final result
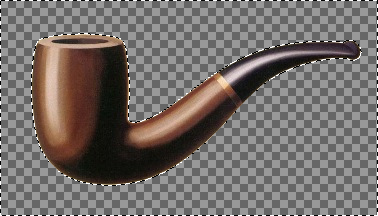
Finally, export the transparent image with File → Export As... to a file format which supports transparency. That would be preferably PNG, but GIF would work as well.
The final result

This work is licensed under a Creative Commons Attribution‑NonCommercial‑ShareAlike 4.0 International License.
Other licensing available on request.

Unless otherwise stated, all originally authored software on this site is licensed under the terms of GNU GPL version 3.
This static web site has no backend database.
Hence, no personal data is collected and GDPR compliance is met.
Moreover, this domain does not set any first party cookies.
All Google ads shown on this web site are, irrespective of your location,
restricted in data processing to meet compliance with the CCPA and GDPR.
However, Google AdSense may set third party cookies for traffic analysis and
use JavaScript to obtain a unique set of browser data.
Your browser can be configured to block third party cookies.
Furthermore, installing an ad blocker like EFF's Privacy Badger
will block the JavaScript of ads.
Google's ad policies can be found here.
transcoded by


 .
.

