miniVNA PRO
Bluetooth with GNU/Linux
Serge Stroobandt, ON4AA
Copyright 2017–2019, licensed under Creative Commons BY-NC-SA
Before proceeding, please, complete the steps for USB connectivity using GNU/Linux. Below instructions depend on those steps being completed first.
Below information is applicable to Ubuntu LTS based systems.
Blueman manager
First, ensure that the blueman package is properly installed:
If this is the first time using blueman, remove the Bluetooth dongle and reinsert it, or alternatively reboot your system.
Start the Bluetooth manager either from the menu or by right clicking the task bar icon and selecting
Devices. Hit the Search button to discover Bluetooth devices in the neigbourhood.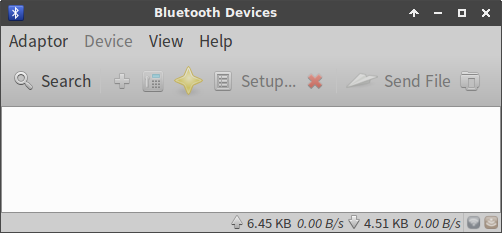
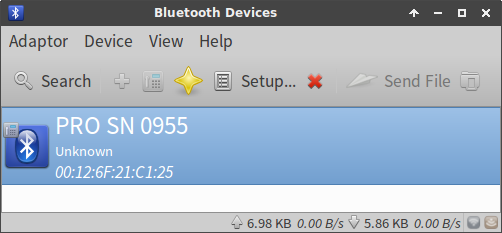
The miniVNA PRO was discovered, but is still not connected.
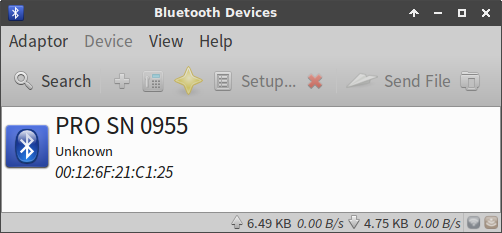
Click with the right mouse button on the discovered device, and select
Pair.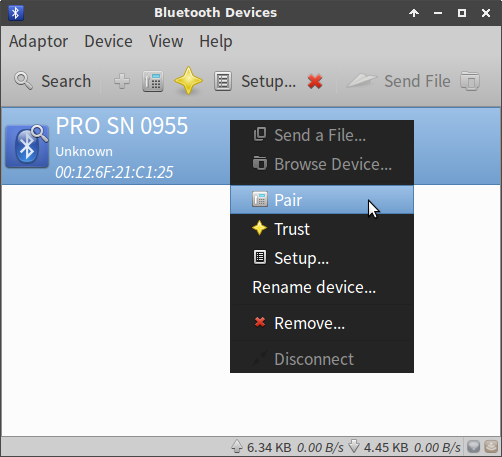
Now, pair the miniVNA PRO using the PIN sequence
1234.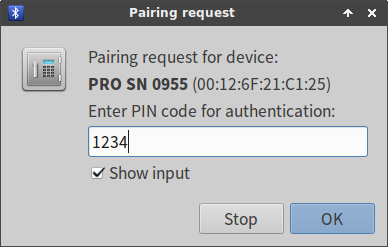
The miniVNA PRO is now paired as evidenced by the small telephone icon on top of the Bluetooth icon. Trusting the device is not necessary and does not influence the bug described in the next section.
Once more, right click on the device and select
Connect To: Serial Port.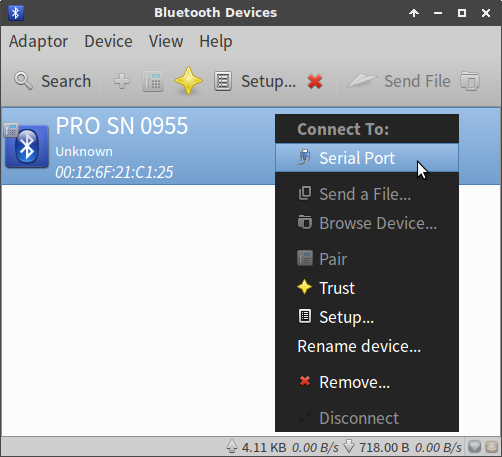
The miniVNA PRO is now connected to a serial port, which
/dev/rfcommport number is indicated at the bottom of the Bluetooth Manager window. Signal strengths are also shown with bar graphs.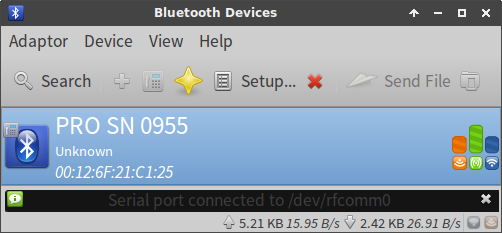
Caveat
When the Bluetooth connection gets interrupted, a new
/dev/rfcommport number will be assigned upon reconnecting. Using Blueman Manager, at least you will be notified about this new/dev/rfcommport number. That way at least you will know what is happening.This stands in contrast to the automatic connection method described by K. Gopa Kumar, VU2XTO, and used for his stand-alone VNA using a Raspberry Pi. However, that method does not always leave clear which port number is in use after a reconnection.
Bluetooth class & version
The miniVNA PRO specifications indicate Class 1 Bluetooth, implicating transmitted power is 20 dBm or 100 mW. Provided a clear line of sight, good antennas and Class 1 devices at both ends, the range could extend up to 100 m.
Whereas class indicates power, the Bluetooth version indicates its modulation scheme and thereby its data rate throughput. The Bluetooth version is not stated in the specifications. However, this can easily be determined by employing the GNU/Linux hcitool command.
First, determine the MAC address of the connected device:
Requesting information about the connected device, reveals the miniVNA PRO runs a link manager protocol (LMP) of version 2.0 which corresponds to Bluetooth version 1.2 (see Table 1).
$ hcitool info 00:12:6F:21:C1:25
Requesting information ...
    BD Address:  00:12:6F:21:C1:25
    OUI Company: Rayson Technology Co., Ltd. (00-12-6F)
    Device Name: PRO SN 0955
    LMP Version: 2.0 (0x3) LMP Subversion: 0x10b7
    Manufacturer: Cambridge Silicon Radio (10)
    Features: 0xff 0xff 0x8f 0xfe 0x9b 0xf9 0x00 0x80
        <3-slot packets> <5-slot packets> <encryption> <slot offset>
        <timing accuracy> <role switch> <hold mode> <sniff mode>
        <park state> <RSSI> <channel quality> <SCO link> <HV2 packets>
        <HV3 packets> <u-law log> <A-law log> <CVSD> <paging scheme>
        <power control> <transparent SCO> <broadcast encrypt>
        <EDR ACL 2 Mbps> <EDR ACL 3 Mbps> <enhanced iscan>
        <interlaced iscan> <interlaced pscan> <inquiry with RSSI>
        <extended SCO> <EV4 packets> <EV5 packets> <AFH cap. slave>
        <AFH class. slave> <3-slot EDR ACL> <5-slot EDR ACL>
        <AFH cap. master> <AFH class. master> <EDR eSCO 2 Mbps>
<EDR eSCO 3 Mbps> <3-slot EDR eSCO> <extended features>| LMP version | Bluetooth version |
|---|---|
| 0 | 1.0b (withdrawn) |
| 1 | 1.1 (withdrawn) |
| 2 | 1.2 (withdrawn) |
| 3 | 2.0 + EDR |
| 4 | 2.1 + EDR |
| 5 | 3.0 + HS |
| 6 | 4.0 |
| 7 | 4.1 |
| 8 | 4.2 |
| 9 | 5.0 |
| 10 | 5.1 |
Blueman bug
Now comes the less elegant, tricky part… Normally, whilst running vna/J, one would select now the newly created rfcomm port by entering the Analyzer → Setup … menu. However, if one runs vna/J as a normal, unprivileged user, any attempt to connect to the newly created /dev/rfcomm port by hitting the Test is welcomed with a red Failed to open port! notification. This is sometimes followed by a rather obscure purejavacomm.PortInUseException.
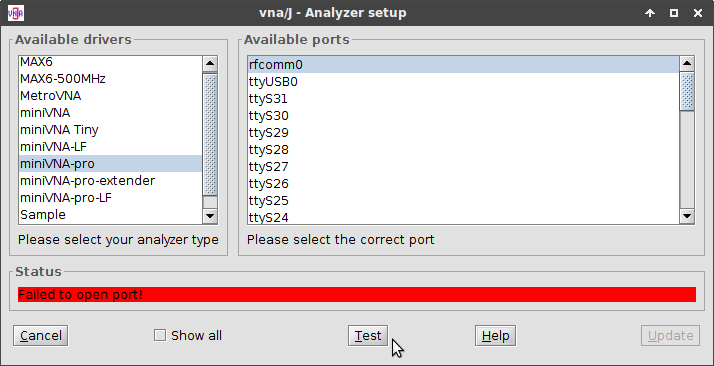
Red Failed to open port! notification

purejavacomm.PortInUseException error
The issue at hand is caused by a confirmed Blueman bug that is currently being worked on.
Launching vna/J with pkexec
On GNU/Linux, only the .jar Java™ archive file is required. Personally, I find it convenient to keep this file in the directory /home/opt/ham/vna-j/.
Below bash script helps with always launching the latest version of vna/J, even when more than once version is available in the /home/opt/ham/vna-j/ directory. The script is stored in my /home/bin/ham/ custom scripts folder under the filename vna-j. It should be made executable with chmod +x vna-j. Adding the /home/bin/ham/ path to the $PATH environment variable might come handy for debugging Java™ errors.
# !/usr/bin/env bash

INSTALLDIR='/home/opt/ham/vna-j'

# Run the latest version of vna/J.
java -jar $(ls -1v $INSTALLDIR/vnaJ*.jar |tail -n 1) &
Because of the previously mentioned very annoying Blueman permission issue, the script vna-j needs to be launched using pkexec.
To successfully run the program using the Polkit infrastructure (Archlinux info), a krause.vna.gui.policy file needs to created in the /usr/share/polkit-1/actions/ directory. This policy file refers to my /home/bin/ham/vna-j launcher script.
<?xml version="1.0" encoding="UTF-8"?>
<!DOCTYPE policyconfig PUBLIC
 "-//freedesktop//DTD PolicyKit Policy Configuration 1.0//EN"
 "http://www.freedesktop.org/standards/PolicyKit/1/policyconfig.dtd">
<policyconfig>
    <action id="org.freedesktop.policykit.pkexec.vna-j">
    <vendor>Dietmar Krause, DL2SBA</vendor>
    <vendor_url>https://vnaj.dl2sba.com/</vendor_url>
    <description>Run vna/J program</description>
    <message>Authentication is required to run vna/J</message>
    <defaults>
        <allow_any>auth_admin</allow_any>
        <allow_inactive>auth_admin</allow_inactive>
        <allow_active>auth_admin</allow_active>
    </defaults>
    <annotate key="org.freedesktop.policykit.exec.path">/home/bin/ham/vna-j</annotate>
    <annotate key="org.freedesktop.policykit.exec.allow_gui">true</annotate>
    </action>
</policyconfig>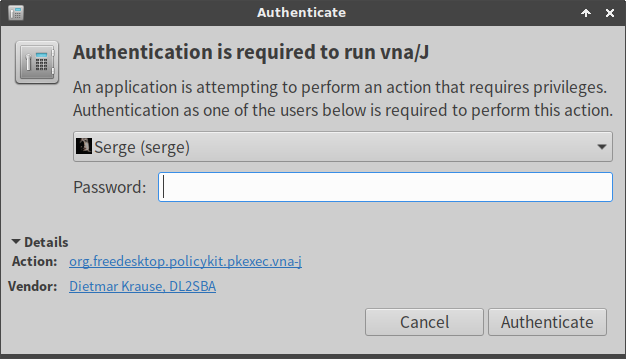
Authentication when launching vna/J using pkexec
The same command may also be launched from a custom desktop launcher button. The method to create desktop launchers differs with each desktop environment. To the left of this paragraph, one can find the official vna/J icon.
Launch vna/J using the above script and enter the Analyzer → Setup … menu. Click the Test button and wait for a brief moment. If the correct rfcomm port number was selected, the Bluetooth connection should work now, indicated by a green coloured notification. Sometimes, two connection attempts are required. On the second Test button click, the connection should be established almost immediately. If indeed successful, do not forget to click on Update.
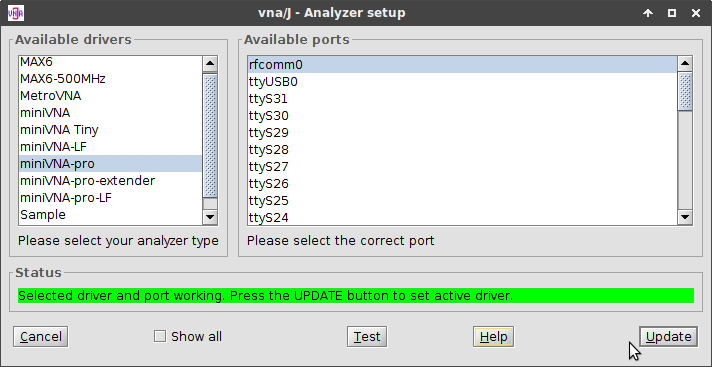
The selected port works now. Do not forget to click the Update button.
You should now be able to perform miniVNA PRO measurements wirelessly, using Bluetooth. Personally, I have found the miniVNA PRO Bluetooth connection set up in this way to be very stable, fast and replicable.

This work is licensed under a Creative Commons Attribution‑NonCommercial‑ShareAlike 4.0 International License.
Other licensing available on request.

Unless otherwise stated, all originally authored software on this site is licensed under the terms of GNU GPL version 3.
This static web site has no backend database.
Hence, no personal data is collected and GDPR compliance is met.
Moreover, this domain does not set any first party cookies.
All Google ads shown on this web site are, irrespective of your location,
restricted in data processing to meet compliance with the CCPA and GDPR.
However, Google AdSense may set third party cookies for traffic analysis and
use JavaScript to obtain a unique set of browser data.
Your browser can be configured to block third party cookies.
Furthermore, installing an ad blocker like EFF's Privacy Badger
will block the JavaScript of ads.
Google's ad policies can be found here.
transcoded by
 .
.


