
miniVNA PRO
USB Connection with GNU/Linux
Serge Stroobandt, ON4AA
Copyright 2017–2019, licensed under Creative Commons BY-NC-SA
Introduction
Dietmar Krause, DL2SBA, undertook the monumental effort to write the vna/J Java™ application for controlling a range of very affordable mini Radio Solutions vector network analysers (VNAs). Java™ applications are platform independent. Once written, these applications should run on every platform that supports Java™, without any need for recompilation.
The vna/J application forms no exception to this. It runs perfectly well on GNU/Linux distributions. However, the installation procedure on GNU/Linux has not been officially documented and requires a small effort.
This text is loosely based on the excellent vna/J installation guide for SUSE and Ubuntu written by Andy Eskelson, G0POY. Below information is applicable to Ubuntu LTS based systems.
User groups
First and foremost, make sure that your username is a member of the dailout, tty and uucp GNU/Linux user groups:
Log out and in again for these changes to take effect.
Java™
Check whether a Java™ runtime environment is installed.
$ java -version
    java version "1.8.0_101"
    Java(TM) SE Runtime Environment (build 1.8.0_101-b13)
    Java HotSpot(TM) 64-Bit Server VM (build 25.101-b13, mixed mode)
RXTX for Java™ no longer
In a personal communication, Dietmar confirmed that recent vna/J versions no longer require the RXTX for Java™ library.
Launching vna/J with pkexec
 icon
icon- One can download vna/J and its user guide amongst other documentation from Dietmar’s site. On GNU/Linux, only the
.jarJava™ archive file is required. Personally, I find it convenient to keep this file in the directory/home/opt/ham/vna-j/.
Below bash script helps with always launching the latest version of vna/J, even when more than once version is available in the /home/opt/ham/vna-j/ directory. The script is stored in my /home/bin/ham/ custom scripts folder under the filename vna-j. It should be made executable with chmod +x vna-j. Adding the /home/bin/ham/ path to the $PATH environment variable might come handy for debugging Java™ errors.
# !/usr/bin/env bash

INSTALLDIR='/home/opt/ham/vna-j'

# Run the latest version of vna/J.
java -jar $(ls -1v $INSTALLDIR/vnaJ*.jar |tail -n 1) &
Because of a very annoying device read/write permission issue using Java™ on GNU/Linux, the script vna-j needs to be launched using pkexec. Strictly speaking, this is a Bluetooth Manager bug. However, if you were using your miniVNA PRO with Bluetooth and then plug the VNA back in with USB, you will equally be affected!
To successfully run the program using the Polkit infrastructure (Archlinux info), a krause.vna.gui.policy file needs to created in the /usr/share/polkit-1/actions/ directory. This policy file refers to my /home/bin/ham/vna-j launcher script.
<?xml version="1.0" encoding="UTF-8"?>
<!DOCTYPE policyconfig PUBLIC
 "-//freedesktop//DTD PolicyKit Policy Configuration 1.0//EN"
 "http://www.freedesktop.org/standards/PolicyKit/1/policyconfig.dtd">
<policyconfig>
    <action id="org.freedesktop.policykit.pkexec.vna-j">
    <vendor>Dietmar Krause, DL2SBA</vendor>
    <vendor_url>https://vnaj.dl2sba.com/</vendor_url>
    <description>Run vna/J program</description>
    <message>Authentication is required to run vna/J</message>
    <defaults>
        <allow_any>auth_admin</allow_any>
        <allow_inactive>auth_admin</allow_inactive>
        <allow_active>auth_admin</allow_active>
    </defaults>
    <annotate key="org.freedesktop.policykit.exec.path">/home/bin/ham/vna-j</annotate>
    <annotate key="org.freedesktop.policykit.exec.allow_gui">true</annotate>
    </action>
</policyconfig>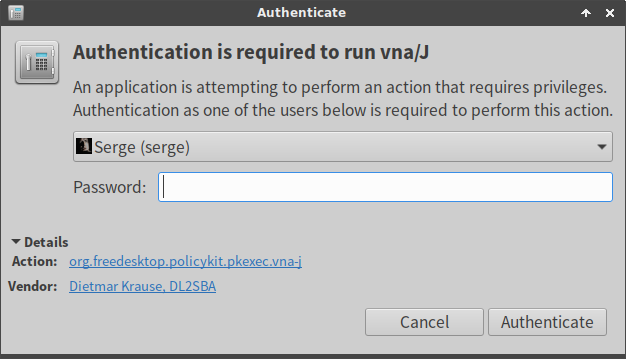
Authentication when launching vna/J using pkexec
The same command may also be launched from a custom desktop launcher button. The method to create desktop launchers differs with each desktop environment. To the left of this paragraph, one can find the official vna/J icon.
Once vna/J launched, you need to indicate to which ttyUSB port number, the miniVNA is connected. This can easily be checked by executing the dmesg command on the command line, immediately after plugging in the VNA. The last dmesg entries should be similar to those below, mentioning the exact ttyUSB number.
$ dmesg
    [ 4975.484020] usb 6-1: new full-speed USB device number 4 using uhci_hcd
    [ 4975.686034] usb 6-1: New USB device found, idVendor=0403, idProduct=6001
    [ 4975.686039] usb 6-1: New USB device strings: Mfr=1, Product=2, SerialNumber=3
    [ 4975.686042] usb 6-1: Product: FT232R USB UART
    [ 4975.686045] usb 6-1: Manufacturer: FTDI
    [ 4975.686048] usb 6-1: SerialNumber: A8005Bji
    [ 4975.694074] ftdi_sio 6-1:1.0: FTDI USB Serial Device converter detected
    [ 4975.694113] usb 6-1: Detected FT232RL
    [ 4975.696377] usb 6-1: FTDI USB Serial Device converter now attached to ttyUSB2
Now, you are good to calibrate your particular VNA measurement setup with a short, open and load (SOL) calibration set prior to performing the actual measurements. In the rare case of experiencing erratic calibration results (Figure 1), continue reading the remainder of this document.
Failed to open port!
Even though vna/J was properly launched using pkexec, one may still very occasionally run into a Failed to open port! error when trying to connect to the port indicated by the dmesg command. If this happens, hitting the funky red FUNC button on the VNA should resolve this temporary problem.
Calibration
Correct usage of a VNA indispensably requires calibrating the virtual measuring plane of any new measurement setup, jig, cables, etc. Personally, I prefer the mode 2 calibration with some overscans and an adequate number of calibration steps.
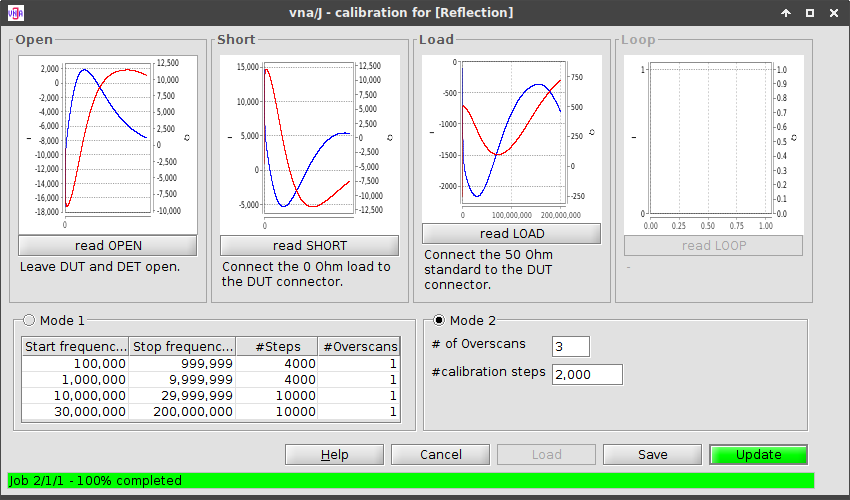
Mode 2 calibration with 3 overscans and 2000 calibration steps. More for both is better, but takes more time.
Erratic calibration & measurements

- After not having used my miniVNA PRO for a while, I had a strange case of erratic calibration and measurement results (see Figure 2). The resulting graphs were noncontinuous and showed many spikes over an impossible measurement range. The issue remained even after fully charging the lithium-ion battery.
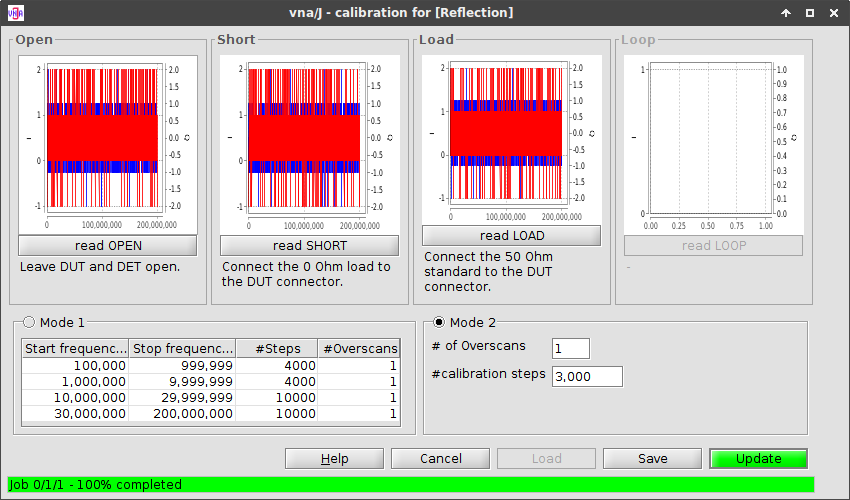
Erratic calibration results
Solution: Reinstall the firmware
Hitting the red FUNC key showed different but still impossible values for one subsequent measurement only. Eventually, this led me to conclude that something might be wrong with the firmware, even though the device reported the firmware to be up to date.
Indeed, reinstalling the latest firmware using vna/J on GNU/Linux resolved my issue. This seems to indicate that the miniVNA PRO’s firmware memory is volatile when the lithium-ion battery loses its charge.
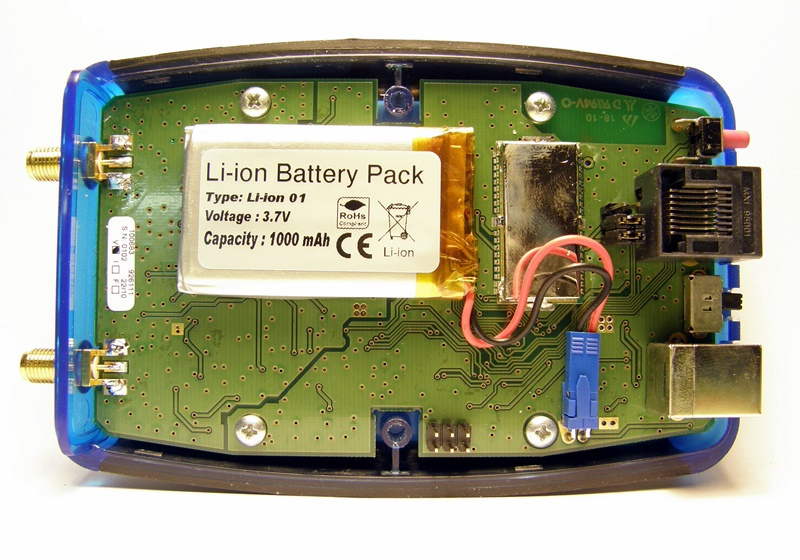
The lithium-ion battery pack inside the miniVNA PRO
Bluetooth connectivity
Only after successfully completing above steps, continue reading here to learn how to connect the miniVNA PRO using Bluetooth on GNU/Linux.

This work is licensed under a Creative Commons Attribution‑NonCommercial‑ShareAlike 4.0 International License.
Other licensing available on request.

Unless otherwise stated, all originally authored software on this site is licensed under the terms of GNU GPL version 3.
This static web site has no backend database.
Hence, no personal data is collected and GDPR compliance is met.
Moreover, this domain does not set any first party cookies.
All Google ads shown on this web site are, irrespective of your location,
restricted in data processing to meet compliance with the CCPA and GDPR.
However, Google AdSense may set third party cookies for traffic analysis and
use JavaScript to obtain a unique set of browser data.
Your browser can be configured to block third party cookies.
Furthermore, installing an ad blocker like EFF's Privacy Badger
will block the JavaScript of ads.
Google's ad policies can be found here.
transcoded by


 .
.

